- Read Tutorial
- Watch Guide Video
In this guide we're going to start building out our proposal data model. To do that I'm going to take a little bit different approach than we did with the document mainly because one our proposal is going to be doing quite a few more things than the document does but also just you can see that there are multiple ways of accomplishing the same feature.
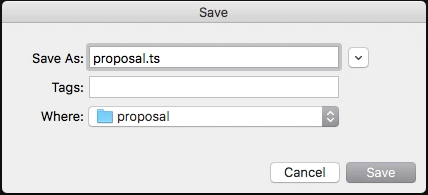
I'm going to come up to proposal and inside of this I"m going to create a new file and I'm just going to call this proposal.ts.

Now inside of this I'm going to export but instead of exporting an interface like before I'm actually going to create a class. So this is going to be a proposal class. And inside of our proposal we're going to create a constructor function. So I'm going to put constructor and this is going to have a number of arguments. The first argument here is going to be marked as public and it's going to be an ID. And I want to make these all optional. And the reason I'm making them optional will be clear much further down the line. It's going to just be so that we don't have to worry about some data validation things that if we didn't make them optional they would cause errors. So I'm going to say public ID with a question mark and it's going to be number.

And it says constructor implementation is missing. Let's just fix this so that it doesn't have that annoying error. If you add these curly brackets then it'll stop complaining.
export class Proposal {
  constructor(
    public id?: number,

    ) {}
}
Now that we have our first one done, the next one is going to be a customer. So here this is going to be customer and this is going to be of type string. After this it's going to be portfolio URL. And this one's not going to be optional because we're going to pass in an initial default value. So here what we're going to do, if you remember in the typescript course we can give these constructor values or these method arguments a default value by giving an equals and then whatever we want to pass. So this is of data type string and we're saying that the default value that this is going to have is HTTP slash slash and that is going to be the start of our portfolio URL.
    public customer?: string,
    public portfolio_url: string = 'http://',

You'll see once we get into working with forms how this is going to work.
Next one is going to be tools with the question mark because it's optional. Then the next one is going to be estimated hours. Next one is going to be hourly rate. And then weeks to complete. And actually you know what? Hourly rate, and weeks to complete, and estimated hour should all be of data type number. And our very last one is going to be client email and this one is going to be of data type string.
    public tools?: string,
    public estimated_hours?: number,
    public hourly_rate?: number,
    public weeks_to_complete?: number,
    public client_email?: string,

Part of the reason why I have these configured the way I have them right here is just based on having a direct mapping between this and the API. I may or may not come back and change these. And one of the really cool things about working with angular is you do have the ability to quickly switch up your data model. So in an applications or in frameworks like Rails it's a little bit more challenging in order to change your data model and say your columns you have to go and create data migrations and things like that. But in angular we don't have a database. All we're going to be doing is communicating with API. So we can call these things whatever we want and change them on the fly. It's a lot more straight forward.
A good example of how this could work is let's just set up a sample one here we have ABC Company. Followed by having something like http slash slash portfolios dot Jordan Hudgens dot com. Followed by the tools which would be Ruby on Rails. Followed by 150, 120, 15, and then for this last one we could say this client e-mail could just be Jordan at Dev Camp dot com.

So what I'm doing here is I'm just giving us what a sample proposal could look like. If you notice each one of these, beside's the ID, I could add an ID here at the beginning. We could say Id of 15 for a customer of ABC company with a portfolio URL of this URL with tools like Ruby on Rails. Estimated hours of 150. That's not a string it's a number. Then an hourly rate of 120, weeks to complete 15, and then the client email. This part you don't have to follow along but what I like to do a lot of times is in my class file that's going to store the data like this, I like to just set up what a sample system might look like. So a sample record might look something like this, and then it makes a little bit easier whenever I'm referencing that instead of having to go through and look at every one of these items. I can look and see what a sample record would look like.
That is a proposal class and nothing changes on the screen over here because we have to start actually using it. And that's we're going to get into in the next guide.